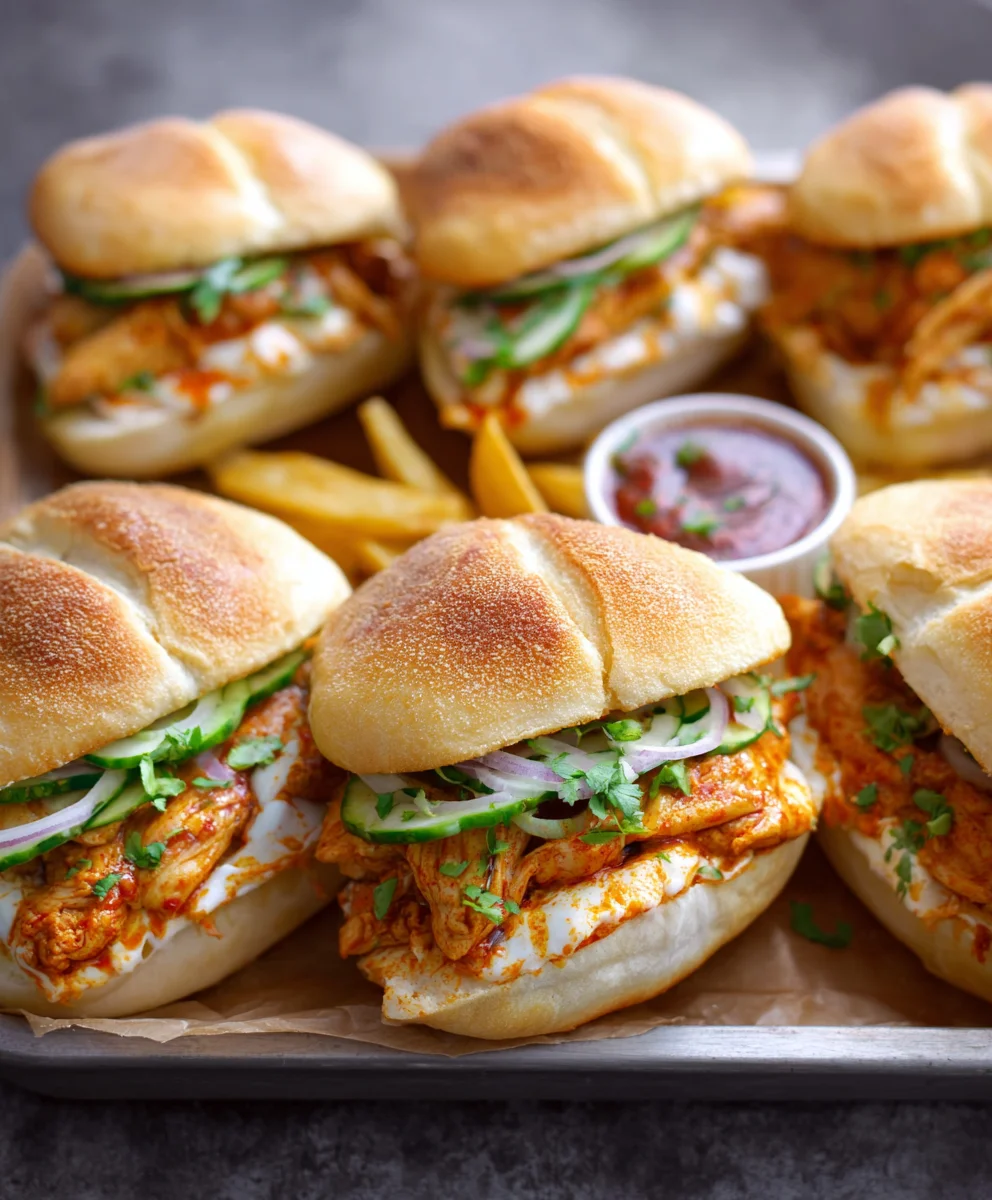
Cheesy Dynamite Chicken Buns, where do I even begin to describe the sheer delight that awaits you? I’m incredibly excited to introduce you to a culinary masterpiece that marries the irresistible comfort of soft, fluffy buns with a fiery, savory chicken filling, all enveloped in a blanket of gooey, melted cheese. This isn’t just a recipe; it’s an experience, a symphony of flavors and textures designed to ignite your taste buds and leave you craving more.
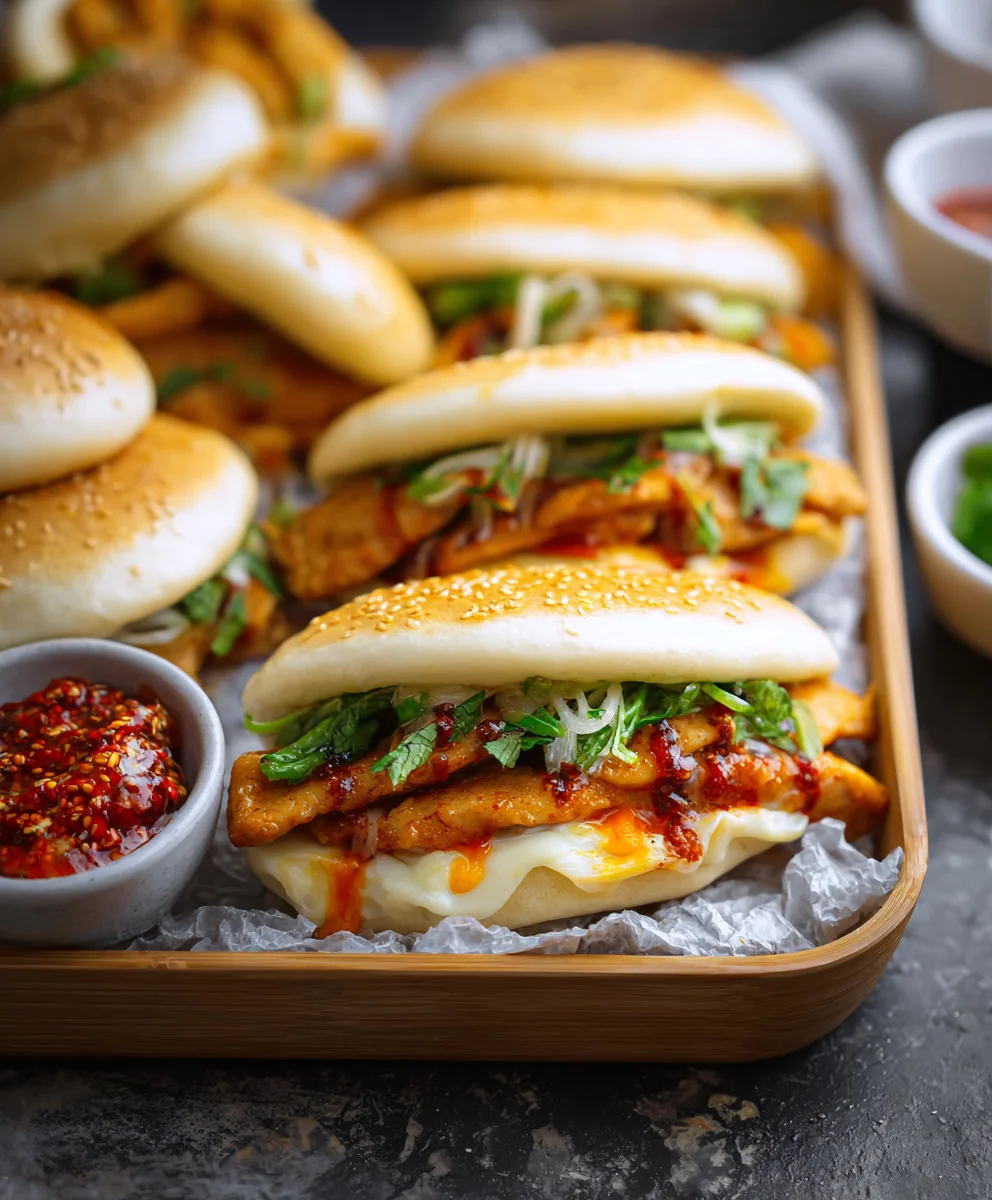
While these magnificent buns may not boast centuries of ancient tradition, they represent a thrilling modern fusion of global culinary influences. They draw inspiration from the beloved steamed buns (bao) of East Asia, combined with the bold, spicy profiles often found in Korean-inspired chicken dishes, and then elevated with a universally adored element: cheese! It’s a testament to how diverse ingredients can come together to create something truly spectacular and uniquely satisfying, defining a new kind of comfort food for today’s palate.
People absolutely adore these Cheesy Dynamite Chicken Buns for so many wonderful reasons. The initial bite offers the pillowy softness of the bun, giving way to the tender, well-seasoned chicken that packs a perfect spicy punch—enough to excite, but not overwhelm. Then, that glorious, melted cheese emerges, adding a rich, creamy counterpoint that perfectly balances the heat and ties everything together into one harmonious mouthful. They’re incredibly versatile, perfect as a show-stopping appetizer for your next gathering, a delightful snack, or even a light yet fulfilling meal. I assure you, they are destined to become a new favorite in your kitchen!
Ingredients:
- For the Dough:
- 1 cup (240ml) warm milk (105-115°F / 40-46°C)
- 2 ¼ teaspoons (7g) active dry yeast (one standard packet)
- ¼ cup (50g) granulated sugar, plus a pinch for yeast
- 1 large egg, room temperature
- ½ cup (113g) unsalted butter, softened, cut into cubes
- 4 cups (500g) all-purpose flour, plus more for dusting
- 1 teaspoon (6g) salt
- For the Dynamite Chicken Filling:
- 1 ½ pounds (approx. 680g) boneless, skinless chicken breasts or thighs, cooked and shredded
- ½ cup (120g) mayonnaise, full-fat recommended
- ¼ cup (60ml) sweet chili sauce
- 2-3 tablespoons (30-45ml) Sriracha sauce, adjust to your spice preference
- 1 tablespoon (15ml) soy sauce, low sodium preferred
- 1 tablespoon (15ml) rice vinegar
- 1 teaspoon sesame oil
- 2 cloves garlic, minced
- 1 inch fresh ginger, grated (optional, but highly recommended)
- ½ cup finely diced red bell pepper
- ¼ cup finely diced red onion or green onions (white parts)
- 2 tablespoons fresh cilantro, chopped (for garnish, or mixed into filling)
- Salt and freshly ground black pepper to taste
- For the Cheesy Layer:
- 1 ½ cups shredded mozzarella cheese
- ½ cup shredded cheddar cheese
- For the Egg Wash & Topping:
- 1 large egg, beaten
- 1 tablespoon water or milk
- 1 tablespoon sesame seeds (white or black, or a mix)
- Optional: Extra shredded cheese for topping
- Optional: Fresh green onions or chives, chopped, for garnish after baking
Prep Work & Dough Making
Creating the perfect dough is the foundation for our incredible Cheesy Dynamite Chicken Buns. Trust me, a little patience here pays off big time!
- Activate the Yeast: In a large mixing bowl or the bowl of a stand mixer, combine the warm milk (make sure it’s not too hot, or it’ll kill the yeast!), a pinch of granulated sugar, and the active dry yeast. Give it a gentle stir and let it sit for about 5-10 minutes. You’ll know it’s ready when it becomes frothy and bubbly on top – that means your yeast is alive and ready to work its magic! If it doesn’t foam, your yeast might be old or your milk wasn’t the right temperature, and you’ll need to start this step over.
- Combine Wet Ingredients: Once your yeast is active, add the remaining ¼ cup of granulated sugar and the room temperature egg to the yeast mixture. Whisk everything together until well combined. Using a room temperature egg is important as it integrates better into the dough and helps with a lighter texture.
- Add Dry Ingredients & Mix: In a separate bowl, whisk together the all-purpose flour and salt. Gradually add the dry ingredients to the wet ingredients in the stand mixer (with the dough hook attachment) or in your large mixing bowl if kneading by hand. Mix on low speed until a shaggy dough forms, or use a sturdy spoon if mixing by hand.
- Incorporate the Butter: Add the softened, cubed butter, one cube at a time, to the dough mixture. Continue mixing on low speed until all the butter is incorporated. The dough might look a bit messy at this stage, but don’t worry, it’s all part of the process!
- Knead the Dough: Increase the stand mixer speed to medium-low and knead for 8-10 minutes, or turn the dough out onto a lightly floured surface and knead by hand for 12-15 minutes. This kneading process is crucial for developing the gluten, which gives our buns their wonderful chewiness and structure. The dough should become smooth, elastic, and no longer sticky, easily pulling away from the sides of the bowl or your hands.
- First Proofing: Lightly grease a clean large bowl with a little oil. Transfer the kneaded dough to the bowl, turning it once to coat the entire surface with oil. Cover the bowl tightly with plastic wrap or a clean kitchen towel. Place it in a warm, draft-free place for 1 to 1.5 hours, or until the dough has doubled in size. This could be a slightly warm oven (turned off!), near a sunny window, or just on your kitchen counter if it’s warm enough.
- Punch Down & Prepare for Shaping: Once doubled, gently punch down the dough to release the air. Turn it out onto a lightly floured surface. At this point, you can gently knead it for a minute or two to release any stubborn air bubbles and ensure an even texture.
Preparing the Dynamite Chicken Filling
While your dough is proofing, you can get ahead by preparing the sensational “dynamite” chicken filling. This is what makes our Cheesy Dynamite Chicken Buns truly unforgettable!
- Cook and Shred Chicken: If your chicken isn’t already cooked, you can boil, bake, or pan-fry your chicken breasts or thighs until fully cooked. Once cool enough to handle, shred or finely dice the chicken. Aim for small, manageable pieces that will easily fit into the buns and distribute evenly. I usually use two forks to shred it for that perfect texture.
- Combine Dynamite Sauce Ingredients: In a medium-sized mixing bowl, combine the mayonnaise, sweet chili sauce, Sriracha (adjust to your heat preference – I like mine with a good kick!), soy sauce, rice vinegar, and sesame oil. Whisk everything together until the sauce is smooth and creamy.
- Add Aromatics and Vegetables: Stir in the minced garlic, grated ginger (if using), finely diced red bell pepper, and finely diced red onion or green onion whites. These additions provide a wonderful crunch, freshness, and aromatic depth to the filling.
- Mix Chicken into Sauce: Add the shredded chicken to the sauce mixture. Using a spoon or spatula, gently fold the chicken until every piece is thoroughly coated with the delicious dynamite sauce.
- Season to Taste: Taste the filling and adjust seasonings as needed. You might want a little more Sriracha for heat, more sweet chili for sweetness, or a pinch of salt and pepper. Remember, balance is key here to achieve that perfect dynamite flavor profile that compliments the cheese in our Cheesy Dynamite Chicken Buns.
- Optional Cilantro: If you love cilantro, you can stir a tablespoon or two of chopped fresh cilantro into the mixture now. Alternatively, save it for a fresh garnish after baking.
Assembling the Cheesy Dynamite Chicken Buns
This is where our two delicious components come together! Take your time, and enjoy the process of shaping these delightful Cheesy Dynamite Chicken Buns.
- Prepare Work Surface and Baking Sheet: Lightly flour your work surface. Line one or two large baking sheets with parchment paper. You’ll likely need two sheets if you’re making standard-sized buns, as they need space to expand.
- Portion the Dough: Divide the dough into 12-16 equal pieces. The exact number depends on how large you want your buns to be. For generous buns, aim for 12; for slightly smaller, more snack-sized buns, go for 16. I usually weigh my dough for consistency, aiming for about 60-70g per piece. Roll each piece into a smooth ball.
- Flatten the Dough: Take one dough ball and flatten it into a circle, about 4-5 inches in diameter, with the edges slightly thinner than the center. You can use a rolling pin or simply flatten it with your hands.
- Fill with Chicken and Cheese: Place about 1 ½ to 2 tablespoons of the dynamite chicken filling in the center of the dough circle. Don’t overfill, or it will be hard to seal! Top the chicken filling with a generous sprinkle of the mixed mozzarella and cheddar cheese. I find the mozzarella gives that perfect melty stretch, while the cheddar adds a sharp flavor note.
- Seal the Buns: Carefully gather the edges of the dough around the filling, bringing them together at the top to form a seam. Pinch the seam firmly to seal the bun completely. Make sure there are no gaps where the filling could escape during baking. Once sealed, gently roll the bun between your palms to smooth out the surface and create a nice, round shape. This technique ensures a beautifully rounded Cheesy Dynamite Chicken Bun.
- Arrange on Baking Sheet: Place the sealed buns seam-side down on the prepared baking sheets, leaving about 2 inches of space between each bun to allow for expansion during the second proofing and baking.
- Second Proofing: Cover the baking sheets loosely with plastic wrap or a clean kitchen towel. Place them in a warm, draft-free spot for another 30-45 minutes, or until the buns have visibly puffed up and increased in size by about 50%. This second proof is essential for light and fluffy buns, so
don’t rush this stage!
It truly makes a difference in the final texture of your Cheesy Dynamite Chicken Buns.
Baking the Buns to Golden Perfection
We’re almost there! The aroma that will fill your kitchen as these Cheesy Dynamite Chicken Buns bake is absolutely heavenly.
- Preheat Oven: About 15-20 minutes before the second proofing is complete, preheat your oven to 375°F (190°C).
- Prepare Egg Wash: In a small bowl, whisk together the beaten egg with 1 tablespoon of water or milk. This egg wash will give our buns a beautiful golden-brown color and a lovely sheen.
- Egg Wash and Toppings: Gently brush the tops of the proofed buns with the egg wash. Be careful not to deflate them. Sprinkle generously with sesame seeds. If you desire, you can also sprinkle a little extra shredded cheese on top of some buns for an even cheesier crust – my personal favorite!
- Bake the Buns: Transfer the baking sheets to the preheated oven. Bake for 18-25 minutes, or until the buns are puffed up, beautifully golden brown, and cooked through. Baking time can vary depending on your oven and the size of your buns, so keep an eye on them. If they start to brown too quickly, you can loosely tent them with aluminum foil.
- Cooling: Once baked, remove the Cheesy Dynamite Chicken Buns from the oven and transfer them to a wire rack to cool for at least 10-15 minutes before serving. This allows the filling to set and prevents you from burning your mouth with the molten cheese!
Serving Suggestions & Storage
These Cheesy Dynamite Chicken Buns are best enjoyed warm, fresh out of the oven, but they also make fantastic leftovers!
- Serve Warm: Serve the buns while they are still warm for the ultimate experience. The dough will be soft, the chicken filling will be piping hot and flavorful, and the cheese will be wonderfully melted and gooey. You can garnish them with fresh chopped green onions or chives for an extra burst of color and fresh flavor.
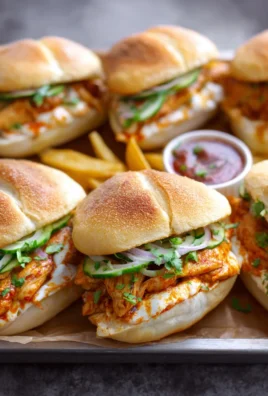
- Pairing Suggestions: These buns are hearty enough to be a light meal on their own, especially when paired with a simple green salad or a cup of clear soup. They also make an impressive appetizer for parties or a delightful snack for family gatherings.
- Storage: Leftover Cheesy Dynamite Chicken Buns can be stored in an airtight container at room temperature for up to 1 day, or in the refrigerator for up to 3-4 days.
- Reheating: To reheat, I highly recommend placing them in a preheated oven or toaster oven at 300°F (150°C) for about 8-12 minutes, or until warmed through. This will help crisp up the crust and remelt the cheese without making the buns soggy, unlike microwave reheating, which can sometimes make the dough a bit chewy. You can also quickly zap them in the microwave for 30-60 seconds if you’re in a hurry, though the texture won’t be quite as good as oven reheating.
- Freezing Instructions: If you want to make a big batch, these buns freeze wonderfully! Once completely cooled, wrap each bun individually in plastic wrap, then place them in a freezer-safe bag or container. They can be frozen for up to 2-3 months. To reheat from frozen, place them directly in a preheated oven at 325°F (160°C) for 15-20 minutes, or until heated through.
Conclusion:
Well, my friends, we’ve reached the exciting end of our culinary journey for today, but the real adventure is just beginning in your kitchen! I truly hope you’re feeling inspired and hungry, because what we’ve just discussed isn’t just a recipe; it’s an experience waiting to happen. If you’ve been searching for that one dish that perfectly balances comfort, a touch of exciting heat, and undeniable flavor, then look no further. This recipe for Cheesy Dynamite Chicken Buns is, without a doubt, a must-try for anyone who appreciates truly satisfying food. It’s not just about the chicken; it’s about the explosion of creamy, spicy filling perfectly encased in soft, golden buns, topped with that irresistible molten cheese pull. This dish transcends the ordinary; it takes simple ingredients and elevates them into something truly spectacular. Imagine the aroma filling your home as these bake – it’s absolutely intoxicating! I’ve lost count of how many times this recipe has saved me from dinner dilemmas or turned a casual gathering into a memorable feast. It’s the kind of dish that garners compliments and requests for the recipe every single time, making you feel like a master chef without all the fuss.
Now, let’s talk about making these beauties even more your own. While they are utterly fantastic straight out of the oven, serving them up with a fresh, crisp side salad can make for a perfectly balanced meal. A simple coleslaw or even some roasted vegetables can also complement the richness beautifully. Think about game day parties, potlucks, or even a cozy family dinner – these buns fit every occasion. They’re incredible as a standalone snack, a hearty appetizer, or even as the star of a light lunch. But don’t stop there! The beauty of this recipe lies in its adaptability. For those who like it even spicier, a dash more chili flakes or a finely diced habanero can really turn up the heat. If you’re catering to milder palates, simply reduce the amount of sriracha or omit the chili flakes entirely. Experiment with different cheeses too! A sharp cheddar can add a tangy bite, while a smoked gouda could introduce a wonderful depth of flavor. You could even mix in some finely chopped bell peppers or corn into the chicken filling for added texture and nutrients. And for a truly gourmet touch, consider brushing the tops of your buns with a garlic herb butter just before baking for an extra layer of savory goodness. The possibilities are truly endless, allowing you to tailor this incredible recipe to your personal taste and what you have on hand.
So, what are you waiting for? I wholeheartedly encourage you to dive into your kitchen this week and give these phenomenal Cheesy Dynamite Chicken Buns a try. Trust me, your taste buds will thank you, and your family and friends will be clamoring for more. Don’t be shy – embrace the joy of creating something truly delicious from scratch! Once you’ve had a chance to bake and savor these delightful buns, please come back here and share your experience in the comments below. Did you try a unique variation? What was your favorite part? I absolutely love hearing about your culinary adventures and seeing your creations. Snap a picture and tag us on social media too – let’s spread the cheesy, spicy bun love far and wide! Happy baking, everyone!
Frequently Asked Questions about Cheesy Dynamite Chicken Buns
-
Q: Can I prepare Cheesy Dynamite Chicken Buns ahead of time?
-
A: Absolutely! There are a couple of ways to do this. You can prepare the chicken filling a day or two in advance and store it in an airtight container in the refrigerator. When you’re ready to bake, simply assemble the buns and proceed with the baking instructions. Alternatively, you can assemble the entire buns, place them on a baking sheet, cover loosely with plastic wrap, and refrigerate for up to 24 hours. Let them come to room temperature for about 30 minutes before baking, or add a few extra minutes to the baking time.
-
Q: How spicy are these Cheesy Dynamite Chicken Buns, and can I adjust the heat?
-
A: The “dynamite” in the name suggests a kick, and yes, they do have a pleasant, medium-level heat thanks to the sriracha and chili flakes. However, adjusting the spice level is incredibly easy! For a milder version, simply reduce the amount of sriracha or omit the chili flakes altogether. For those who crave more fire, feel free to add extra sriracha, a pinch of cayenne pepper, or even some finely diced jalapeños or serrano peppers to the chicken mixture. It’s all about tailoring it to your personal preference.
-
Q: What’s the best way to store and reheat leftover Cheesy Dynamite Chicken Buns?
-
A: Leftover buns can be stored in an airtight container in the refrigerator for up to 3-4 days. To reheat, I recommend placing them in a preheated oven at 350°F (175°C) for 10-15 minutes, or until warmed through and the cheese is bubbly again. This method helps the buns retain their texture better than microwaving, which can sometimes make them a bit soft. You can also quickly warm them in an air fryer for a crispy finish!
-
Q: Can I use different types of chicken or cheese for this recipe?
-
A: Absolutely! While the recipe often calls for cooked, shredded chicken (like rotisserie or boiled chicken breast), you can certainly use cooked chicken thighs for a juicier result. As for cheese, the possibilities are endless! Mozzarella is fantastic for that classic gooey pull, but feel free to experiment. Pepper jack will add an extra layer of spice, sharp cheddar offers a tangy contrast, or a blend of your favorite melting cheeses would also be delicious. Don’t be afraid to get creative and use what you love!
-
Q: Is it possible to make a vegetarian version of these Cheesy Dynamite Buns?
-
A: Yes, it is! While the original is a Cheesy Dynamite Chicken Bun, you can easily adapt the filling to be vegetarian. Instead of chicken, consider using finely crumbled and sautéed extra-firm tofu, shredded jackfruit, or a hearty mixture of finely chopped mushrooms and black beans. Season these alternatives with similar spices to mimic the original flavor profile, and you’ll still achieve a wonderfully savory, cheesy “dynamite” bun that’s perfect for meatless meals.
Cheesy Dynamite Chicken Buns
A delightful fusion recipe marrying soft, fluffy buns with a fiery, savory chicken filling, all enveloped in gooey, melted cheese. Inspired by East Asian steamed buns and Korean-style spicy chicken, these buns offer a perfect balance of textures and flavors.
Ingredients
-
1 cup (240ml) warm milk
-
2 ¼ teaspoons (7g) active dry yeast
-
¼ cup (50g) granulated sugar, plus a pinch
-
1 large egg, room temperature
-
½ cup (113g) unsalted butter, softened
-
4 cups (500g) all-purpose flour
-
1 teaspoon (6g) salt
-
1 ½ pounds (680g) cooked, shredded chicken breasts or thighs
-
½ cup (120g) mayonnaise
-
¼ cup (60ml) sweet chili sauce
-
2-3 tablespoons (30-45ml) Sriracha sauce
-
1 tablespoon (15ml) soy sauce
-
1 tablespoon (15ml) rice vinegar
-
1 teaspoon sesame oil
-
2 cloves garlic, minced
-
1 inch fresh ginger, grated (optional)
-
½ cup finely diced red bell pepper
-
¼ cup finely diced red onion or green onion whites
-
2 tablespoons fresh cilantro, chopped (optional)
-
Salt and freshly ground black pepper to taste
-
1 ½ cups shredded mozzarella cheese
-
½ cup shredded cheddar cheese
-
1 large egg, beaten (for egg wash)
-
1 tablespoon water or milk (for egg wash)
-
1 tablespoon sesame seeds
-
Optional: Extra shredded cheese for topping
-
Optional: Fresh green onions or chives, chopped (for garnish)
Instructions
-
Step 1
Activate Yeast: In a large bowl, combine warm milk, a pinch of sugar, and yeast. Stir gently and let sit for 5-10 minutes until frothy. -
Step 2
Combine Wet & Dry Ingredients: Add remaining ¼ cup sugar and egg to the yeast mixture; whisk. In a separate bowl, whisk flour and salt. Gradually add dry ingredients to wet, mixing until a shaggy dough forms. -
Step 3
Incorporate Butter & Knead: Add softened butter, one cube at a time, mixing until incorporated. Knead dough (8-10 min with stand mixer or 12-15 min by hand) until smooth, elastic, and no longer sticky. -
Step 4
First Proofing: Lightly grease a clean bowl, transfer dough, turning to coat. Cover tightly and proof in a warm, draft-free place for 1 to 1.5 hours, or until doubled in size. -
Step 5
Prepare Chicken Filling: If needed, cook and shred chicken. In a medium bowl, combine mayonnaise, sweet chili sauce, Sriracha, soy sauce, rice vinegar, and sesame oil; whisk smooth. Stir in minced garlic, ginger (optional), diced red bell pepper, and red onion/green onion whites. Add shredded chicken and mix until thoroughly coated. Season to taste; stir in cilantro if desired. -
Step 6
Portion & Flatten Dough: Gently punch down proofed dough. Turn onto a lightly floured surface and divide into 12-16 equal pieces (approx. 60-70g each). Roll each piece into a smooth ball. Flatten each ball into a 4-5 inch circle, with edges slightly thinner than the center. -
Step 7
Fill & Seal Buns: Place 1½ to 2 tablespoons of chicken filling in the center of each dough circle. Top with a generous sprinkle of mixed mozzarella and cheddar cheese. Carefully gather dough edges around the filling, bringing them together at the top. Pinch seam firmly to seal completely. Gently roll bun between palms to smooth and shape. -
Step 8
Second Proofing: Place sealed buns seam-side down on parchment-lined baking sheets, leaving about 2 inches between each. Cover loosely and proof in a warm, draft-free spot for 30-45 minutes, or until buns have visibly puffed up by about 50%. -
Step 9
Preheat Oven & Prepare Toppings: Preheat oven to 375°F (190°C). In a small bowl, whisk 1 beaten egg with 1 tablespoon water or milk for the egg wash. Gently brush the tops of the proofed buns with the egg wash. Sprinkle generously with sesame seeds and optional extra shredded cheese. -
Step 10
Bake: Bake for 18-25 minutes, or until the buns are puffed up, beautifully golden brown, and cooked through. If browning too quickly, loosely tent with aluminum foil. -
Step 11
Cool & Serve: Remove buns from oven and transfer to a wire rack to cool for 10-15 minutes before serving warm. Garnish with fresh chopped green onions or chives if desired. -
Step 12
Storage & Reheating: Store leftovers in an airtight container at room temperature (up to 1 day) or in the refrigerator (3-4 days). Reheat in a preheated oven or toaster oven at 300°F (150°C) for 8-12 minutes. For freezing, cool completely, wrap individually, and store in a freezer-safe bag for 2-3 months. Reheat from frozen at 325°F (160°C) for 15-20 minutes.
Important Information
Nutrition Facts (Per Serving)
It is important to consider this information as approximate and not to use it as definitive health advice.
Allergy Information
Please check ingredients for potential allergens and consult a health professional if in doubt.
Leave a Comment